PSXVX
RGB status LED
Posted on: Mar 27, 2019 10:23 PM UTC
As my PS1 receives more capabilities than initially possible, it needs a status LED showing more states than just
For this reason I need to have more colors than just green.
I chose an RGB LED to replace the original LED and it will be driven by a Raspberry Pi.
ON/OFF.For this reason I need to have more colors than just green.
I chose an RGB LED to replace the original LED and it will be driven by a Raspberry Pi.
Deleting original LED
Getting rid of it is pretty quick, just desolder and pull it out.
Sadly its legs are bent so it's not practical but it will leave without too much work.
Sadly its legs are bent so it's not practical but it will leave without too much work.
Placing the new LED
Hard rework of the traces is out of question so I left the whole RGB LED and its legs above the board.
I bent them at around 100° to be able to solder something on it without touching anything on the board.
I put a connector on the legs and I kept the LED and the connector in place with some hot glue.
I bent them at around 100° to be able to solder something on it without touching anything on the board.
I put a connector on the legs and I kept the LED and the connector in place with some hot glue.
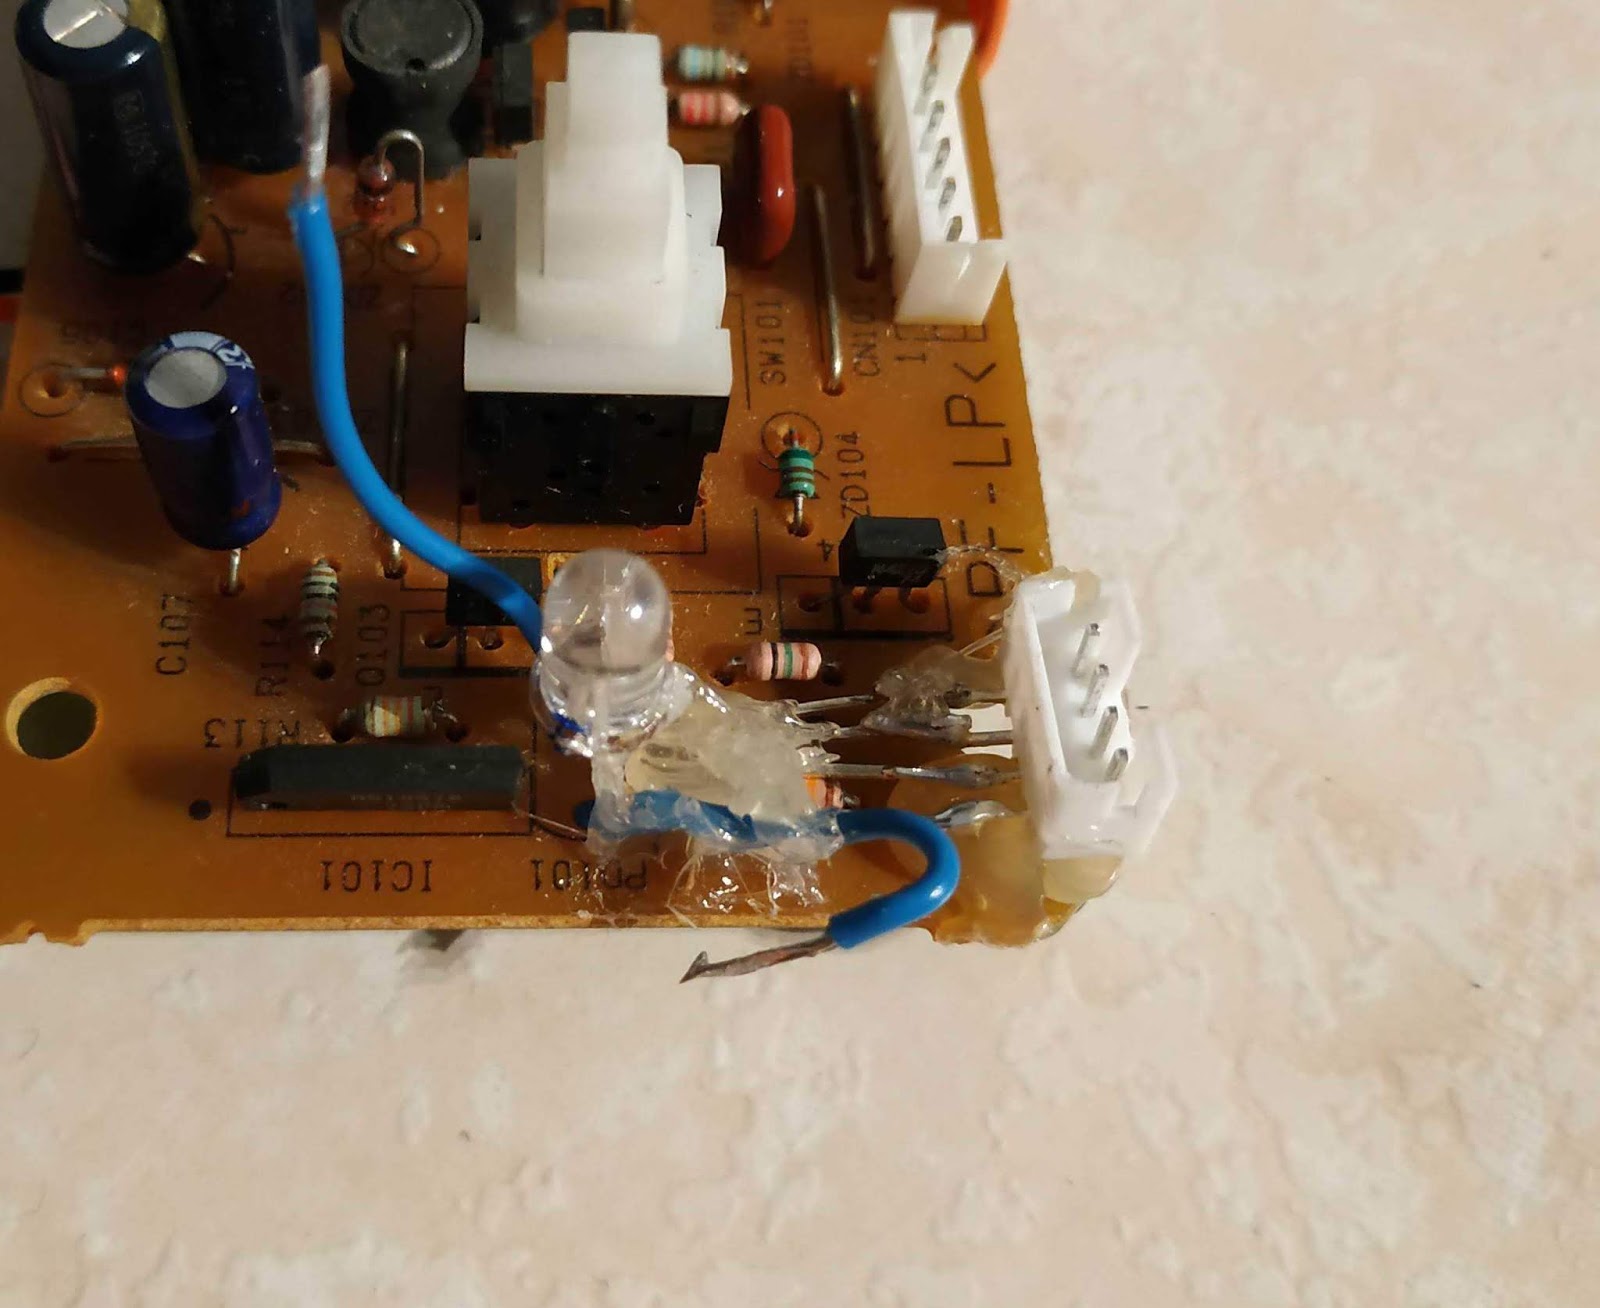
Don't mind the two blue cables
Controlling
Solder the VCC (or GND, check if your LED is common anode or common cathode) and the color legs to the RPi and choosing the color will be as easy as controlling 3 GPIO's.
The intensity of each color will be choosable using PWM.
The intensity of each color will be choosable using PWM.
Video
Here is a video of my PS1 with the RGB LED.
Sadly my bad quality mobile phone needs extreme darkness so that we can see the colors changing.
Sadly my bad quality mobile phone needs extreme darkness so that we can see the colors changing.
Click to load the YouTube video
No comments yet
 ·
· ·
· ·
·